madbookings

Night sky guide · 2027 edition · free & printable

Stargazing in Namibia — the darkest skies on earth

The first night out of the towns, most visitors do the same thing: step outside, look up, and go quiet. Almost nobody on earth lives here, the desert air is bone-dry, and the bright core of our galaxy passes directly overhead — which is why Namibia holds some of the darkest measured skies on the planet and Africa's first International Dark Sky Reserve. This guide covers all of it: where the sky is best, what you're actually looking at, when to come, and exactly how to photograph and timelapse it — from a phone propped on a rock to a full manual camera rig.

The headline
NamibRand — Africa's first International Dark Sky Reserve
Best months
May–September · Milky Way core overhead, cloudless nights
The golden rule
Plan around the new moon — ±5 days of true darkness
Phone or camera
Both work under these skies — full technique inside

A rare alignment

Why Namibia has the sky everyone else lost

Truly dark skies need three things at once, and Namibia is one of the only places on earth with all of them. First, almost nobody lives here — one of the lowest population densities of any country — so the light pollution that has erased the stars over Europe, America and Asia simply doesn't exist; drive an hour from any town and there is no glow on any horizon. Second, the air is desert-dry: minimal humidity, negligible haze, and in winter essentially zero cloud, night after night after night. Third, the latitude: from the southern hemisphere the brilliant core of the Milky Way — the dense, dust-laned centre of our galaxy — climbs directly overhead instead of hugging the horizon as it does up north.

The result is measurable, not just poetic. The NamibRand Nature Reserve was certified as an International Dark Sky Reserve — the first in Africa — at the highest (gold) tier, its skies rated among the darkest ever measured by the certifying body. And here's Namibia's open secret: the certified reserve is simply where someone did the paperwork. Skies of essentially the same quality stretch across most of the rural country, which is why serious astronomers travel across the world to observe here, and why the Gamsberg area hosts dedicated astronomy farms with resident telescopes.

For everyone else, it's simpler than science: stand outside your lodge, let your eyes adjust, and see the Milky Way cast a shadow. Most visitors rank it with the dunes and the elephants — and it's included free with every clear night.
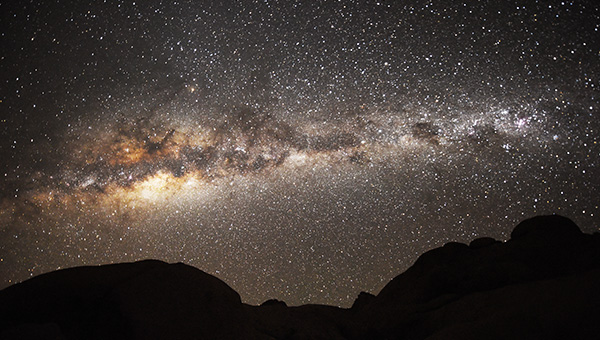
The Milky Way over the dunes of the NamibRand Nature Reserve
NamibRand — gold-tier certified, among the darkest measured skies on the planet
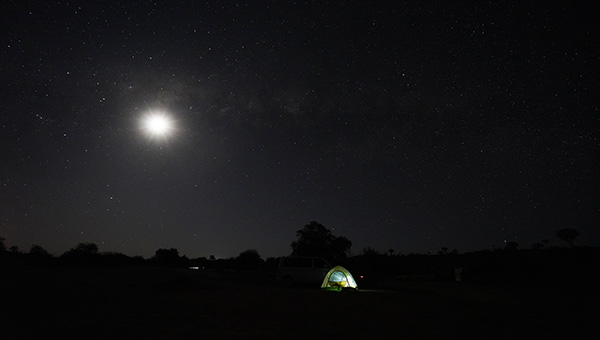
A tent under a moonlit sky Namibia
An hour from any town, there is no glow on any horizon

Where the night is best

The best stargazing places in Namibia

The honest headline: anywhere 50 km from a town gives you a sky most visitors have never seen. But some places combine darkness with foregrounds, facilities or astronomy culture that lift them above the rest.

Namibia's dark-sky destinations at a glance
PlaceWhy it's special for the night sky
NamibRand ReserveAfrica's first International Dark Sky Reserve, gold tier — the certified benchmark, with exclusive lodges, star-bed sleep-outs and guided astronomy on several concessions
Sossusvlei / Sesriem areaDune silhouettes as foregrounds, desert-dry air, and lodges from camping to luxury; borders the NamibRand darkness
SpitzkoppeThe photographer's favourite: the granite arch and peaks under the Milky Way, campsites among the boulders, zero light for a hundred kilometres
Gamsberg / Hakos areaNamibia's astronomy heartland — high, dry mountain air and dedicated astronomy guest farms with serious resident telescopes for guided deep-sky observing
Damaraland & TwyfelfonteinRugged foregrounds — boulders, ancient valleys — with lodges built for exactly this; pair rock art by day with the galaxy by night
Aus & the deep southHigh, cold, crystal-clear southern skies on the road between Fish River Canyon and Lüderitz — hauntingly quiet
The KalahariRed-dune horizons and camel thorn silhouettes; guest farms with sundowner dunes that become star decks after dinner
Etosha's campsNot the darkest (camp lighting), but floodlit-waterhole evenings followed by a short walk to genuine darkness — wildlife sounds included

Several lodges — especially around the NamibRand, Sossusvlei and Gamsberg — offer telescopes, resident star guides or roll-out star beds where you sleep under the open sky. Tell us stargazing matters when we plan your trip and we'll route you through the right ones. Destination detail: our Spitzkoppe, Sossusvlei and Twyfelfontein guides.

A tour of the southern sky

What you're actually looking at

The southern sky is objectively richer than the northern, and Namibia serves it at full brightness. The showpiece is the Milky Way core — the bright, mottled centre of our galaxy in Sagittarius and Scorpius, dense with star clouds and cut by dark dust lanes. From here it rises high overhead; on a moonless winter night it's bright enough to light your path.

Around it, the southern classics: the Southern Cross with its two Pointer stars (the closest bright star system to earth among them); the Magellanic Clouds, two entire companion galaxies hanging like detached puffs of the Milky Way, invisible from the northern hemisphere; Omega Centauri, the finest globular cluster in the sky, a ball of millions of ancient stars visible to the naked eye; and the great curl of Scorpius with red Antares at its heart. On the darkest nights you may catch the zodiacal light — a soft pyramid of glow after dusk, sunlight scattering off dust in the plane of the solar system — a phenomenon only genuinely dark places ever reveal. Satellites, meteors and the occasional fireball punctuate all of it.

The sky also has seasons. The galactic core is best from roughly February (pre-dawn) through October (evening), riding highest in June–July. Namibian summer flips the show to Orion overhead, the Magellanic Clouds high, and storm-light drama on the horizons.

The southern-sky checklist

  • Milky Way core — overhead, dust lanes visible to the naked eye
  • Southern Cross & Pointers — the south's compass
  • Magellanic Clouds — two companion galaxies, naked-eye
  • Omega Centauri — the sky's greatest star cluster
  • Scorpius & Antares — the core's fiery gatekeeper
  • Zodiacal light — the dark-sky-only glow after dusk
  • Meteors & satellites — constant traffic once your eyes adapt

Download a stargazing app with offline mode before the trip and set it to red-light night mode — pointing a phone at the sky and watching constellations label themselves is the fastest astronomy lesson there is.

Timing is everything

When to go — seasons, moon & the dark window

Two clocks govern a stargazing trip, and the second one is the one people forget. The first is the season: May to September is prime — cloudless dry-season nights, the galactic core high in the evening sky, and crisp, stable air. Summer (November–April) still delivers spectacular skies between the cloud build-ups, with the bonus of lightning drama, but you'll work around weather.

The second clock is the moon. A bright moon washes out the Milky Way as thoroughly as a city does, so the sacred window is new moon, roughly five days either side — that's when the galaxy detonates across the sky. If star photography is a priority, choose your travel dates from a moon calendar before booking anything else; it's the one itinerary decision that can't be fixed on the ground. (A first-quarter moon isn't wasted, though: it sets around midnight, handing you dark skies in the small hours, and moonlight itself beautifully illuminates dune foregrounds.)

Practical notes: winter desert nights drop near freezing — stargazing is a warm-jacket, beanie-and-gloves activity from June to August — and the best viewing rhythm is simple: full darkness arrives about 90 minutes after sunset, so linger over dinner, then step out when the sky is ready.

The stargazer's planning rules

  • Book the new moon — ±5 days; check the calendar before flights
  • May–Sep — core overhead in the evening, cloudless nights
  • Jun–Jul — the galaxy at its highest and brightest
  • Nov–Apr — works between clouds; Orion season, storm light
  • 90-minute rule — true darkness ~1.5 hrs after sunset
  • Winter kit — near-freezing nights; dress like it

Month-by-month weather for the whole country is in our When to Visit guide — cross-reference it with a moon calendar and you've planned the perfect sky.

No equipment required

How to stargaze well — eyes, binoculars & guides

The best instrument you own is already installed. Human night vision takes 20–30 minutes of real darkness to reach full sensitivity — and one glance at a white phone screen resets the clock. So the technique is patience: lights off, phone away (or on red night mode), and let the sky develop like a photograph. Stars you couldn't see at minute five are obvious at minute twenty-five; by half an hour, the Milky Way's dust lanes resolve and the desert floor glows faintly with starlight. A reclining camp chair or a blanket on a dune turns this from neck exercise into bliss.

Binoculars are the most underrated astronomy tool on earth — an ordinary 8x42 or 10x50 pair (the same ones you brought for birds) transforms the night: the Magellanic Clouds resolve into texture, Omega Centauri becomes a swarm, and sweeping slowly along the Milky Way reveals clusters and nebulae by the dozen. No telescope required.

And when you want the guided version: several lodges — particularly around the NamibRand, Sossusvlei and the Gamsberg astronomy farms — offer telescope evenings and resident star guides who walk you through the southern sky properly, from Saturn's rings to galaxies millions of light years out. If that's your kind of evening, tell us when we book; we'll route you through the right lodges.

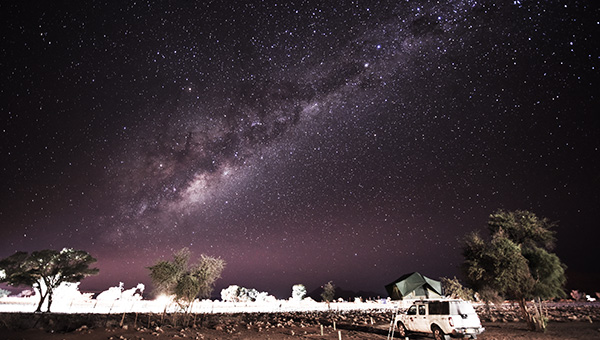
The milky way over a campsite in Sesriem Namibia
Every night has a sky full of stars

The camera in your pocket

Milky Way photos with just a phone

Under Namibian skies, modern phones genuinely deliver. Recent iPhones, Pixels and Samsungs all carry night or astrophotography modes that stack multiple exposures into one bright frame — and the darker the sky, the better they work, which is why results here embarrass anything shot from home.

The technique is 90% stability. The phone must not move at all for the full exposure — hand-holding fails, always. A pocket tripod is ideal; failing that, prop the phone on a rock, a fence post or the car roof with a rolled-up jacket, angle it at the sky, and trigger with the self-timer so your finger doesn't shake it. Then: night mode on, longest exposure the phone offers (Pixel's astrophotography mode engages automatically on a stable phone; iPhone extends to 30 seconds when braced), RAW format if available for editing headroom, and focus/exposure tapped on a bright star. Turn the screen brightness down and shield it — courtesy to your own night vision and anyone near you.

Expect a genuinely impressive Milky Way with visible core structure; don't expect it to match a dedicated camera in fine detail or clean shadows. For social posts and memories it's spectacular. For the frame you'll print, read on.

The phone recipe

  • 1 · Brace it — mini tripod, rock + jacket, car roof; zero movement
  • 2 · Night / astro mode on — longest exposure offered
  • 3 · Self-timer — no finger-shake at the start
  • 4 · Tap a bright star — sets focus and exposure
  • 5 · RAW if available — editing headroom later
  • 6 · Screen dim & shielded — protect night vision
  • 7 · Take many — pick the sharpest; stacking apps help

The full technique

Milky Way photography — the complete camera recipe

Gear that matters

Three things do the work: a camera with manual control (any recent mirrorless or DSLR), the widest and fastest lens you own — 14–24mm at f/1.8–f/2.8 is the sweet spot — and a solid tripod. Everything else is luxury. A headlamp with red mode and spare batteries complete the kit.

Focus first — the step that ruins most night shots

Autofocus is useless in the dark. Switch to manual, aim at the brightest star, magnify in live view, and turn the focus ring until the star is the smallest possible point. Then don't touch it — a strip of tape over the ring is the pro move. Check sharpness on your first frame at full magnification; soft stars can't be fixed later.

The exposure recipe

Start here and adjust: aperture wide open (f/1.8–2.8) · shutter 15–25 seconds · ISO 3200–6400 · white balance 3800–4200K · RAW format, always. The shutter ceiling comes from the earth's rotation: too long and stars smear into trails. The old 500 rule (500 ÷ focal length on full frame = max seconds; e.g. 500 ÷ 20mm = 25s) is a fine field guide — high-resolution sensors reward stopping a few seconds short of it. Namibia's sky is so bright these settings produce dramatic results on frame one; refine from there.

Composition — the foreground is the photo

A sky-only Milky Way frame is an astronomy note; a Milky Way over the Spitzkoppe arch, a quiver tree, a dead camel thorn, a dune ridge or your own camp is a photograph. Scout the foreground in daylight, note where the core will sit (your stargazing app shows you), and arrive with the composition already decided. To lift dark foregrounds: take a second, longer exposure for the land (30–60s at lower ISO) and blend later, or let a low moon or the last of twilight do it naturally.

Star trails — the other night photo

Point at the south celestial pole (use the Southern Cross to find it) and stars wheel in perfect circles. Shoot a continuous series of 30-second frames for 1–3 hours with an intervalometer (minimal gap between frames), then stack them in free software — cleaner and safer than one enormous exposure. Foreground silhouettes make these frames sing.

The field checklist

  • Manual focus on a star — magnified, then taped
  • f/1.8–2.8 · 15–25s · ISO 3200–6400 — the starting recipe
  • RAW + WB ~4000K — fix colour later, not in the field
  • 2-sec delay or remote — no shutter-press shake
  • Check frame one at 100% — sharp stars or start over
  • Foreground scouted by day — the composition is the photo

The sky in motion

Night-sky timelapse — step by step

A timelapse is simply the Milky Way recipe above, repeated hundreds of times and played back as video — the galaxy visibly wheeling over the desert. The maths first, because it sets expectations: at 25 frames per second of final video, every second of footage costs 25 photos. A satisfying 15–20 second clip therefore needs 400–500 frames — call it 3–4 hours of shooting. Namibia is one of the few places where those hours are reliably cloudless.

The setup

Compose and focus exactly as for a single Milky Way frame, then lock everything manual: focus, aperture, shutter, ISO, white balance. Any "auto" setting will drift between frames and flicker in the final video. Set the intervalometer (built into most modern cameras) to shoot continuously: with a 20–25 second exposure, an interval of 25–35 seconds — a 5–10 second gap for the camera to write the file — is the classic rhythm. Disable long-exposure noise reduction (it doubles each frame's time), switch off image stabilisation on the tripod, and start the sequence.

Power, dew & discipline

Cold drains batteries fast — start full, keep spares in a warm pocket, or power via USB from a power bank if your camera allows (the professional move for all-night sequences). In cooler months a lens dew heater band or chemical hand-warmer strapped to the lens barrel prevents the slow fog that quietly ruins hour three. Then the hardest part: don't touch anything. One bumped tripod leg is a visible jump in the final video. Set it running, walk away, and go stargaze.

Assembly

Back home, the frame sequence becomes video in almost any editor: import the image sequence at 24/25fps, or use dedicated timelapse software for deflickering and smooth day-to-night exposure blending. Edit one RAW frame beautifully, sync the edit across the whole sequence, export. That's the entire pipeline.

The advanced moves

The "holy grail" — a sequence running from sunset into full night — requires ramping exposure as light fades: adjust shutter/ISO in small steps every few minutes (or let ramping software plan it), then smooth the transitions in post. It's the most cinematic night sequence there is, and Namibian dusks were made for it. Motion control — a slider or rotating head moving millimetres between frames — adds parallax that turns a good timelapse into a title sequence; a simple pan head nudged by a motorised egg-timer is the famous budget version.

Timelapse recipe card

  • Frames needed — 25 per final second; 400–500 for a real clip
  • Exposure — the Milky Way recipe, locked fully manual
  • Interval — exposure + 5–10s gap (e.g. 20s shots, 30s interval)
  • Noise reduction OFF — it doubles every frame
  • Power — spares in a warm pocket, or USB power bank
  • Dew defence — heater band or hand-warmer on the lens
  • Then hands off — one bump = one visible jump

Filming the desert in real time too? Frame rates, drone rules and location shot-lists live in our Filming Namibia guide; still-photo location cards are in Photographing Namibia.

Comfort is technique

Gear & surviving the cold desert night

Here's the truth nobody puts in camera guides: most night shoots end early not because of equipment but because the photographer got cold. Namibian desert nights — especially June to August — drop toward freezing, and standing still beside a tripod for three hours is the coldest activity on earth. Dress like it's a different season from the afternoon, because it is: thermal base layer, insulated jacket, beanie, gloves (thin liner gloves let you work the camera), warm socks and closed shoes. A flask of coffee or rooibos is morale equipment. A reclining camp chair and a blanket turn the wait between frames into the stargazing session it should be.

The photo kit, consolidated: camera + fastest wide lens · tripod (weight the centre column with your bag in wind) · headlamp with red mode · spare batteries kept warm · power bank + USB cable for timelapse · lens cloth and dew defence · intervalometer if not built in · and offline apps: a planetarium app for finding the core, a moon calendar, and your maps. Charge everything at the lodge; assume nothing charges in the field.

The night kit list

  • Thermals, insulated jacket, beanie, liner gloves — winter nights bite
  • Camera + wide fast lens + tripod — the holy trinity
  • Headlamp with red mode — white light is for emergencies
  • Spare batteries in a warm pocket — cold halves capacity
  • Power bank + cable — all-night timelapse insurance
  • Dew band / hand-warmers — hour three's quiet enemy
  • Camp chair, blanket, flask — comfort keeps you shooting
  • Offline planetarium + moon apps — plan the core, dodge the moon

Full packing for the whole trip — layers, dust defence and all — is in our safari packing guide.

Sharing the dark

Dark-sky etiquette & night safety

Darkness is the resource everyone came for, so the first rule of the night is simple: protect it. White torches and phone screens wreck night vision — yours takes half an hour to recover, and so does everyone else's within sight. Use red light, keep screens dimmed and shielded, and park with headlights facing away from lodges, campsites and anyone with a tripod. If you're light-painting a foreground, check nobody nearby is mid-exposure first; at dark-sky lodges and reserves, follow the lighting rules — they're the reason the sky looks like that.

Then the safety layer, because this is still wild Africa at night. Stay close to camp — a few hundred metres of desert gives you full darkness without wandering into wildlife territory; scorpions, snakes and larger animals all work the night shift, so closed shoes and a scan of the ground with your red light before settling in are basic habits. At unfenced camps and lodges, ask staff where it's sensible to set up. Tell someone where you'll be, take your phone even without signal, and never night-drive to a "better spot" — the sky is identical from the safe one, and our road rules guide explains why the road at night is the real hazard out here.

Do

  • Red light only — headlamp red mode, screens dimmed
  • Set up near camp — full darkness, minimal risk
  • Scan the ground — closed shoes; the desert works nights too
  • Tell someone — where you are, roughly how long
  • Follow lodge lighting rules — they keep the sky dark

Don't

  • Don't sweep white torches — 30 minutes of night vision, gone
  • Don't light-paint over others — check for tripods first
  • Don't wander far in the dark — the sky doesn't improve with distance
  • Don't night-drive for a "better spot" — there isn't one, and the road bites

Quick answers

Stargazing in Namibia — FAQ

Why is Namibia's sky so special?

Almost no light pollution (one of the emptiest countries on earth), bone-dry cloudless desert air, and a southern latitude that puts the Milky Way's bright core directly overhead. NamibRand is Africa's first certified International Dark Sky Reserve — and most of rural Namibia matches it.

When should I plan my trip for the best sky?

May–September for cloudless nights with the galactic core overhead (highest June–July) — and always around the new moon, ±5 days. Check the moon calendar before booking flights; it's the one thing that can't be fixed later.

Can my phone really photograph the Milky Way?

Under these skies, yes — brace it perfectly still, use the longest night/astro mode exposure, self-timer, RAW if offered. Impressive results are normal here; the full-camera recipe just goes further.

What are the camera settings, in one line?

Widest lens, f/1.8–2.8, 15–25 seconds, ISO 3200–6400, manual focus on a bright star, WB ~4000K, RAW. Check frame one at 100% for sharp stars, then refine.

How long does a night timelapse take?

Every second of final video costs ~25 frames, so a 15–20 second clip needs 400–500 shots — about 3–4 hours. Lock everything manual, power well, defend against dew, and don't touch the tripod.

Do lodges offer telescopes or star guides?

Yes — several around the NamibRand, Sossusvlei and the Gamsberg astronomy farms keep serious telescopes, resident guides and even roll-out star beds. Tell us stargazing matters and we'll route your trip through them.

How cold does it get at night?

Near freezing in June–August, even after 30°C afternoons. Thermals, insulated jacket, beanie and gloves are what keep a night shoot going — the cold, not the camera, is what usually ends them early.

The galaxy is waiting

Tell us stargazing matters — we'll build the trip around the sky

Dates chosen around the new moon, nights at the darkest lodges, a star-bed sleep-out booked, the telescope evening arranged — planning for the sky is a real specialty of ours, and it costs nothing extra. One message with your dates and wishlist, and a real person who has stood under that Milky Way takes it from there.

Plan my Namibia   Back to all guides    or WhatsApp us directly

No extra fees

You pay each place's own rate — nothing on top.

Best prices

We know where the value hides in every region.

Expert advice

First-hand, from people who drive these roads.

Friendly, fast service

Real people, replies usually the same day.