madbookings
Real people · No booking fees · 30+ years in Southern Africa

Photography guide · Namibia

Namibia's landscapes,
photographed properly.

A dune doesn't move, which sounds like it makes life easy. It doesn't — it means the picture is decided entirely by when you stand there. Namibia gives you clean air, empty foregrounds and the hardest light in Africa, and rewards anyone who gets up in the dark. Here's the whole craft — for phones, cameras, drones and film alike.

05:30 BLUE HOUR 06:00 GOLDEN 08:00 SOFT 10:00 – 16:00 HARSH · TRAVEL · SLEEP 16:00 SOFT 17:30 GOLDEN 20:00+ ASTRO

The light ladder — the desert gives you about three usable hours a day, and one of them is before breakfast

Rule one
Be standing there before the sun is
Rule two
Shoot long. Namibia is a telephoto country
The support
A tripod — this is the one place it earns its weight
The law
No drones in the national parks. None

01Why Namibia is its own kind of landscape country

Most landscape destinations give you weather. Namibia gives you geometry. The air is exceptionally clear, the horizons are empty, and the land arrives in enormous simple shapes — a dune ridge, a pan floor, a granite dome — with almost nothing cluttering the frame. That is a gift and a trap at once. With so little in the scene, a photograph lives or dies on light angle and composition alone; there is no interesting foreground clutter to rescue a lazy frame.

The second thing to understand is that the country is mostly shot long. Beginners arrive with a wide-angle lens expecting to sweep it all in, and come home with small dunes in big empty frames. The images Namibia is famous for — ridge lines stacked into abstract bands, a black camelthorn skeleton against a burning orange face, an oryx reduced to a dot on a slope — are compression shots, taken at 200mm and beyond.

Wide for the sky and the scale; long for the shapes. If you only bring one lens to the dunes, make it the telephoto.

The third is time. The desert runs on a brutal schedule: roughly ninety good minutes at each end of the day, and six hours in the middle when the light goes simultaneously flat and harsh and everything looks like a snapshot. Namibia doesn't reward the photographer who works hardest. It rewards the one who is standing in the right place at 06:10.
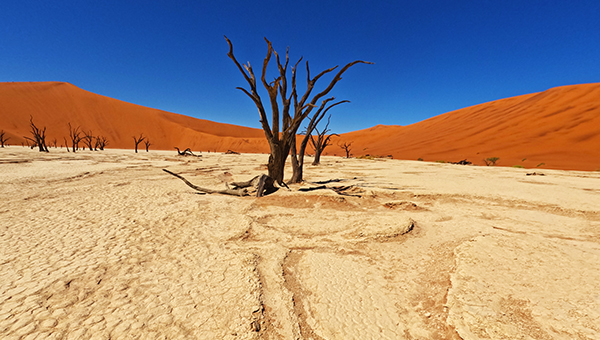
The camelthorn skeletons of Deadvlei against the lit dune wall
Deadvlei — the first hour, while the pan floor is still in shadow
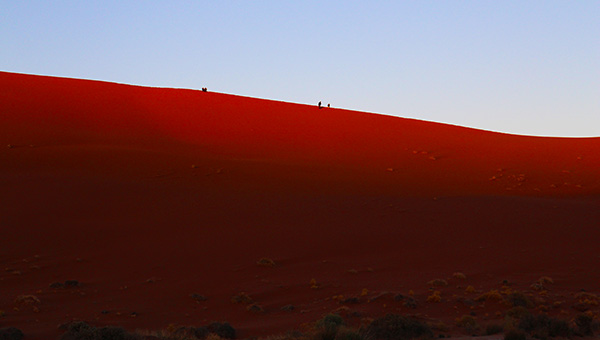
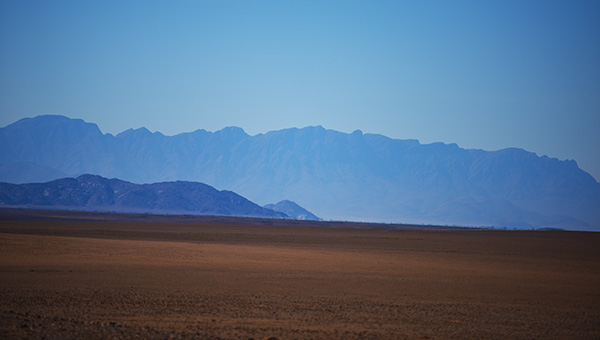
Dune ridges in the Namib at low sun
Shot long: ridge lines stack into bands the wide lens can never find

02The golden rules

  • Be in position before the light, not when it arrives. At Sossusvlei that means being through the gate at opening and walking in the dark. The shot is decided the night before, when you set the alarm
  • Shoot the shadow line, not the dune. What makes a dune photograph is the razor edge between the lit and unlit face. That edge exists for about an hour, and disappears as the sun climbs
  • Put something human-sized in the frame. A person, a vehicle, a lone tree. Without scale, a 300-metre dune photographs like a sand pile
  • Underexpose a third to two-thirds of a stop. Bright sand fools every meter into overexposing, and blown highlights on a dune face cannot be recovered
  • Use a polariser with care. It deepens skies and cuts glare off rock, but at wide angles over these huge clear skies it produces an ugly dark band. Rotate it while watching the sky, not out of habit
  • Level the horizon, then level it again. Empty compositions make a one-degree tilt scream
  • Walk further than the car park. Every famous Namibian viewpoint has a version of the same photograph taken forty metres from the vehicle. Ten more minutes on foot separates your frame from everyone else's
  • Turn around. At sunrise everyone faces the sun. The light behind you — warm, low, side-lighting the ridges — is usually better
  • Stay for blue hour. Most people leave at sunset. The twenty minutes after it, when the sand goes cool violet and the sky still holds colour, are frequently the best of the day
  • Protect the gear before you need to. Fine dust is the real threat here, and by the time you notice it on the sensor it's already there

03Reading the light through a desert day

The ladder at the top of this page is the shape of a Namibian shooting day. It's worth planning your whole itinerary around it, because the difference between the bars is not subtle — it's the difference between a photograph and a record shot.

Before dawn — blue hour

Cool, even, shadowless light with real colour in it. This is when the dune faces read as soft blue-grey shapes and any warm light — a headlamp, a lit tent, a campfire — glows against them. It needs a tripod and a few seconds of exposure, and it's over quickly.

The first ninety minutes — the money window

The sun comes up fast this close to the tropics, and the good light is shorter than photographers from higher latitudes expect. Everything with a ridge or an edge works now. Prioritise ruthlessly: pick one subject, get it right, and don't spend the window walking between locations.

Mid-morning to mid-afternoon — the dead zone

By ten the sun is high, shadows collapse and contrast goes wrong in both directions at once. This is not shooting time; it's driving, scouting, eating and sleeping time. The one exception is deep shade and detail work — rock texture, engravings, interiors, the sand-filled rooms at Kolmanskop — where soft overhead light is genuinely useful.

Late afternoon into golden hour

The mirror of the morning, with one difference: the air has more dust in it by late afternoon, which warms and softens the light. Sunsets here are often more colourful than sunrises for exactly that reason.

After dark

Namibia has some of the least light-polluted skies on Earth, and the NamibRand is an internationally recognised Dark Sky Reserve. The Milky Way core is visible to the naked eye for much of the year. This is not a bonus — for many photographers it's the main reason to come.

Desert dunes in the soft light at sunrise
Blue hour — twenty minutes before dawn
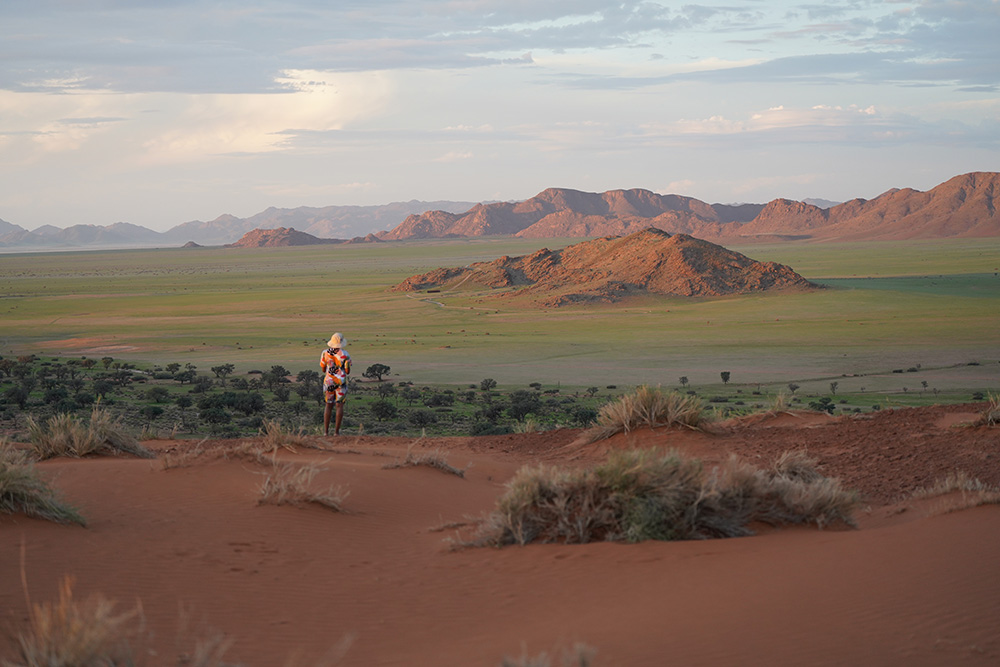
Namib Desert in the green season
Last light on the desert landscape

04Settings & tactics by camera type

The light ladder is the shared foundation — how you work it depends on what's in your hands. Every one of these can come home with a photograph worth printing.

📷 Cameras — mirrorless & DSLR

  • Aperture priority, f/8–f/11: depth of field is rarely the problem in a landscape this deep; sharpness across the frame is. Stopping past f/16 costs you detail to diffraction for no gain
  • Base ISO (50 to 200), on a tripod: there is no reason to be at ISO 800 at dawn if the camera is held still. Clean files matter when the subject is a smooth gradient of sand
  • Expose for the highlights. Use the histogram, not the screen — a bright desert screen lies badly. Dial in −⅓ to −⅔ stop and check the right edge
  • Shoot RAW. The dynamic range between a lit dune face and its shadow is enormous, and RAW is what lets you hold both
  • Reach, not width: a 70–200 or 100–400 is the Namibia lens. Bring the wide for the sky, but expect the telephoto to earn its place
  • Bracket when it's contrasty — three frames two stops apart at sunrise costs nothing and saves the shot
  • Live view with focus magnification for critical focus on ridge lines; autofocus struggles on smooth low-contrast sand
  • Card & battery ritual every night: charged, cleared, lens cleaned, tripod fittings checked after a day of gravel

📱 Smartphones

  • Landscapes don't run away, so a phone's weaknesses matter far less here than on safari. This is the terrain where phones genuinely compete
  • Shoot RAW or ProRAW if you have it, and turn the heavy-handed HDR down — phone processing loves to lift shadows until a dramatic dune goes flat and grey
  • Tap to focus, then drag down to darken. Locking exposure for the sky and letting the land go dark makes a far stronger image than the phone's default compromise
  • Use the telephoto lens, not the pinch. Your phone's 3× or 5× camera is real glass; anything past it is upscaling. Crop later instead
  • Brace it. A small tripod or a phone wedged on a rock turns blue hour and night mode from noisy to usable
  • Night mode works remarkably well under Namibian skies — hold still for the full countdown, or use a mini tripod and the timer
  • Panoramas suit this country, but sweep slowly and keep the horizon in the same place throughout
  • Clean the lens before every stop. Dust plus a fingerprint plus low sun equals a milky flare across everything

🛸 Drones

  • Read this first: drones are banned outright in Namibia's national parks, and restricted at heritage sites such as Twyfelfontein. That rules out Sossusvlei, Etosha and much of what you came to photograph
  • Elsewhere they're regulated, not free. National aviation rules apply, permission may be required, and flying near airports, government buildings or protected areas can mean fines or confiscation
  • Ask your lodge. Private land, private reserves and concessions set their own rules, and many will happily permit a flight over their own property if you ask first
  • The aerial view is the whole point here: dune fields, salt pans and shipwreck coastline resolve into pattern from above in a way no ground position can match
  • Shoot low sun anyway — overhead light kills aerial texture just as it kills ground-level texture
  • Heat, wind and thin air all cut flight time and lift. Land earlier than you think, and expect fast dune-crest wind that isn't there at your feet
  • Sand is fatal to motors. Never launch or land from open sand — use a landing pad, a mat or a hand catch
  • Never fly near wildlife or livestock. A spooked herd is on you, and it's the fastest way to lose access for everyone

🎥 Film, compacts & the rest

  • Film loves this place. Big simple shapes, saturated earth tones and reliable light are exactly what slide film was made for — and the discipline of 36 frames suits a landscape that rewards thinking
  • Meter for the highlights on slide, the shadows on negative. Bright sand will fool an averaging meter by a stop or more; spot-meter the lit dune face and place it high
  • Heat is the enemy. Never leave film in a parked car — interior temperatures here will shift colour badly. Keep it in a cool bag, and hand-check at airports rather than X-raying
  • Bridge and compact superzooms are genuinely well suited to Namibia, precisely because the reach is where the pictures are. Use a tripod and base ISO to get the most from the small sensor
  • Medium format and large format reward the empty compositions enormously — but budget serious time per frame, and a lot of dust discipline for film holders
  • Action cameras earn their place on the road, not the viewpoint: time-lapses through the windscreen on the C14 or the road to Spitzkoppe are worth more than another wide dune shot
  • Whatever you shoot, the ladder above doesn't change. Being there at the right hour beats the sensor every time

05The locations, and what each one demands

Namibia's landmarks each have their own timing problem. These are the ones worth planning your route around.

Deadvlei

Sunrise · first 90 minutes

The white clay pan with its 900-year-old camelthorn skeletons against the orange face of Big Daddy. The famous frame needs the sun on the dune wall while the pan floor is still in shadow — a window of roughly an hour after the light first hits.

Kit: telephoto to isolate trees against the dune; wide only for the full pan. Tripod for the blue-hour version.

Sossusvlei & Dune 45

Sunrise · and again at last light

Ridge lines, curved crests and the S-shape of a dune spine. Dune 45 is the accessible climb; the 4x4 area gives you the bigger, emptier shapes. Footprints ruin a crest, so get there before the crowds do.

Kit: 70–200 and longer. Look for a person on a ridge for scale.

Spitzkoppe

Sunset · then astro

Granite domes glowing red at last light, and the rock arch that frames the sky. One of the best night-sky foregrounds in the country, and you can camp at its foot — which means shooting the arch at 01:00 without a drive.

Kit: wide fast lens for astro; tripod essential; head torch with a red mode.

Kolmanskop

Early morning · photo permit

Sand pouring through the doorways of abandoned diamond-boom houses. Interiors, so this is the rare Namibian subject that tolerates later light — but the early photography permit gets you inside before the general opening and before other visitors' footprints.

Kit: wide for the rooms, tripod for the dark corners, and dust protection.

Fish River Canyon

Sunrise & sunset from the rim

550 metres deep and 27 km wide, which is precisely the problem — the scale flattens in the middle of the day and only low raking light gives the layers separation.

Kit: telephoto for the bends; wide struggles to convey it. Stay for blue hour.

Skeleton Coast & Swakopmund

Fog, any hour

The exception to every rule on this page. Coastal fog gives soft, even light all day, and the wrecks, seal colonies and the point where dunes meet the Atlantic work best in exactly the flat conditions that ruin the interior.

Kit: weather sealing, lens cloths, and a rain cover for salt spray.

Quiver tree forest & Giant's Playground

Sunset · then astro

Near Keetmanshoop, and one of the most reliable star-trail and Milky Way foregrounds in southern Africa. The trees silhouette beautifully, and the balancing dolerite boulders next door repay an hour of walking.

Kit: wide fast lens, tripod, intervalometer for trails.

Twyfelfontein & Damaraland

Early & late · guide required

Red sandstone, the Organ Pipes' basalt columns and Burnt Mountain, which only earns its name in low light. Remember the engravings can only be visited with a guide, and drones are restricted at the heritage site.

Kit: mid zoom, polariser for rock glare, and closed shoes with grip.

06The night sky

Namibia's dark skies are a headline attraction in their own right. The NamibRand Nature Reserve holds international Dark Sky Reserve status, and across most of the country you are hours from any meaningful light pollution. On a moonless night the Milky Way casts a faint shadow.

The settings that work

Start at the widest aperture your lens has, ISO 3200–6400, and an exposure of 15–25 seconds depending on focal length — longer and the stars trail. Focus manually on a bright star using live view magnification, then tape the focus ring so it doesn't drift. Shoot RAW; noise reduction is far better applied later.

The things people get wrong

Chasing a new moon is the big one — check the lunar calendar before booking, because a full moon at Spitzkoppe is beautiful but it erases the Milky Way. The second is forgetting the foreground: a sky full of stars over nothing is a screensaver. A quiver tree, a dune ridge, the Spitzkoppe arch, a lit tent — give it an anchor.

Cold is the surprise. Desert nights drop close to freezing in winter, and standing still for two hours of star trails is nothing like walking around at midday. Bring far more clothing than the daytime suggests.

Phones after dark

Modern phone night modes handle these skies far better than most people expect, and several now have a dedicated astro mode that will resolve the Milky Way if the phone is held perfectly still. A ten-dollar mini tripod is the entire upgrade path.

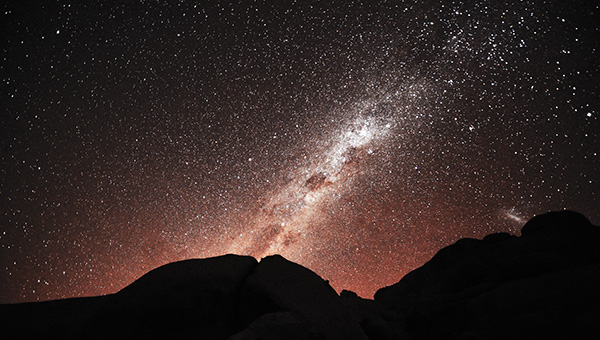
The NamibRand at night, an International Dark Sky Reserve
The NamibRand — an internationally recognised Dark Sky Reserve

07Dust, heat and keeping the gear alive

  • Fine dust is the real threat, not sand. It gets past seals, into zoom barrels and onto sensors, and Namibian dust is exceptionally fine. Change lenses as rarely as you can, and never in wind — do it inside the vehicle with the engine off and windows up
  • Bag everything between locations. A dry bag or a sealed zip bag in the vehicle does more good than any amount of cleaning afterwards. Gravel-road travel keeps dust airborne inside the car all day
  • Blower first, cloth second, never on the sensor. Wiping grit across a front element is how you scratch coatings
  • Let cold gear warm up slowly when you arrive at the coast. Swakopmund's damp air condenses instantly on equipment brought out of an air-conditioned car, and moisture inside a lens is a worse problem than dust
  • Check tripod fittings daily. Hours of corrugated gravel loosen everything — the ball head that fails is always the one you didn't check
  • Batteries drain in the cold at night and in the heat by day. Carry more than you think, and keep spares in an inside pocket during astro sessions
  • Back up every night, twice. A card lost on the C14 is not recoverable, and there's no camera shop between towns. Laptop plus a second card, or two copies on separate cards kept in separate bags
  • Insure it. Self-drive gravel travel is hard on equipment, and theft in cities is a real if modest risk

08Ethics, permissions and the law

  • Ask before photographing people. Every time. Namibia has communities — Himba especially — who are photographed relentlessly by visitors. Ask, accept no for an answer, and be honest about where the picture will end up. A guide or a community-run visit is the right way to do this
  • Don't pay-and-shoot as a transaction without engagement. If there's an agreed fee at a community museum or village, pay it gladly — but a photograph taken out of a car window in exchange for a note is extractive, not documentary
  • Stay on the marked trails. Desert crusts, lichen fields and pan surfaces take decades to recover from a footprint. The lichen along the Skeleton Coast road is alive, and tyre tracks there last a human lifetime
  • Footprints are litter in a dune photograph — yours and everyone's. Walk the shaded side and keep the crest clean, especially at Deadvlei and Dune 45
  • No drones in national parks, and permission needed at heritage sites and on private land. Check before you pack, not after you land
  • Take nothing. Removing stones, plants, fossils or artefacts is illegal, and the Petrified Forest and Twyfelfontein are actively policed for it
  • Don't geotag sensitive sites. The rule from our safari photography guide about never geotagging rhino applies here too, and extends to any fragile or unprotected site your pin could turn into a queue
  • Leave the viewpoint for the next person. Take your frames, then move so somebody else can have the position. It costs nothing

Tick it off

The landscape photography checklists

The camera bag

Phone-only kit

Before you go

The shot list

Print before you fly — the checklists are far more useful on paper at 04:45 than on a phone you're trying not to wake up with.

09Namibia landscape photography FAQs

What's the best time of day to shoot?

The first ninety minutes after sunrise and the last ninety before sunset. In the dunes the morning window matters most, because the low sun splits the lit and shaded faces into the clean shapes Namibia is known for. From about ten to four the light goes flat and harsh at once — travel, scout or sleep.

What lens should I bring?

If you bring one, make it a telephoto. A 70–200 or longer compresses dune ridges into layered bands and isolates a lone tree against a dune face, which is where most of Namibia's signature imagery comes from. A 16–35 covers the sky and scale shots, but it's the second lens here, not the first.

Can I fly a drone?

Not in the national parks — that's an outright ban, and it covers Sossusvlei and Etosha. Heritage sites like Twyfelfontein need special permission. Elsewhere drones fall under national aviation regulation and may require authorisation, with fines or confiscation for flying without it. Private lodges and reserves often will say yes over their own land if you ask.

Is a phone good enough?

For landscapes, far more than people expect. Nothing is running away, so the reach problem that limits phones on safari barely applies. Shoot RAW if you can, turn the aggressive HDR down, lock exposure for the sky, use the real telephoto lens rather than pinching, and brace it on something at dawn. Night mode under these skies is genuinely impressive.

Do I need a tripod?

Yes — and this is the opposite of our safari advice, where a beanbag wins. Blue hour, astro, long exposures and careful compositions on empty landscapes all want a tripod. Bring one sturdy enough for dune-crest wind, and check the fittings after every gravel day.

How do I keep dust out of the camera?

Change lenses as little as possible and never in wind — do it in the vehicle with the windows up. Keep everything sealed in a bag between locations, use a blower rather than a cloth, and let gear warm up gradually before opening it in the damp coastal air at Swakopmund.

When should I go for the night sky?

Around the new moon, and check the lunar calendar before you book rather than after. The NamibRand is an internationally recognised Dark Sky Reserve and the skies across most of the country are exceptional, but a full moon will wash the Milky Way out entirely.

Can I photograph people?

Ask first, every time, and accept no. Some communities — the Himba particularly — are photographed constantly by visitors, and arriving through a guide or a community-run visit is the respectful way to do it. Where there's an agreed fee, pay it willingly, but don't treat a photograph as a transaction taken from a car window.

The best light needs the right bed

We build trips around the hour you need to be standing there

A night inside the Sossusvlei gate so you're at Deadvlei before the day visitors. A campsite at the foot of Spitzkoppe for the arch at one in the morning. New moon dates for the NamibRand. Tell us the pictures you want to come home with and a real person will build the route that makes them possible. No booking fees, ever.

Plan my photography trip    or WhatsApp us directly

No extra fees

You pay each place's own rate — nothing on top.

Best prices

We know where the value hides in every region.

Expert advice

First-hand, from people who've stood in this light.

Friendly, fast service

Real people, replies usually the same day.